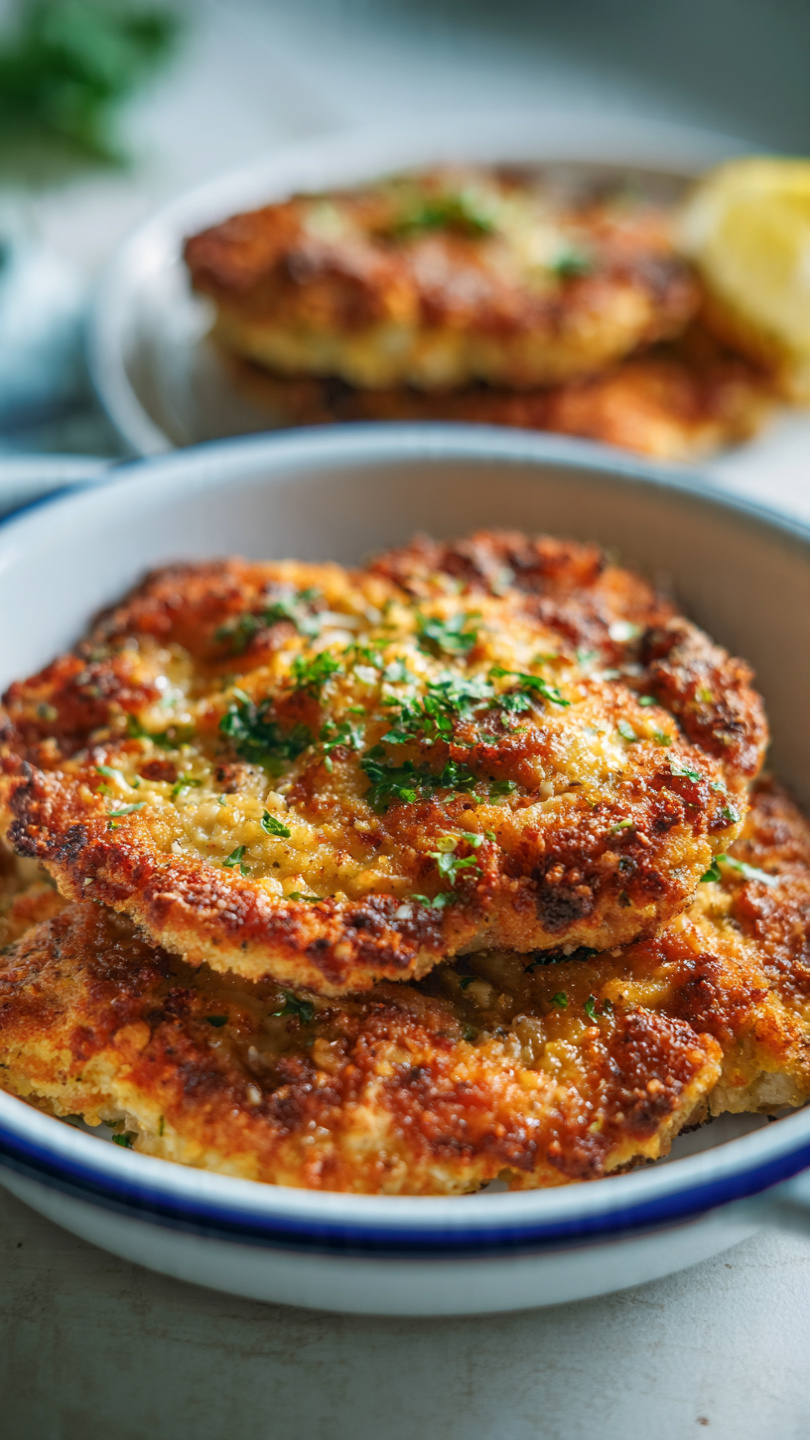
The Best Crispy Chicken Cutlets (Pan-Fried to Golden Perfection)
These golden, crispy chicken cutlets are tender on the inside and perfectly crunchy on the outside, made with a seasoned breadcrumb coating that delivers incredible flavor in under 30 minutes.

The Only Crispy Chicken Cutlet Recipe You Will Ever Need
There is something deeply satisfying about a perfectly cooked chicken cutlet. That audible crunch when you cut through the golden crust. The juicy, tender interior that somehow stays moist no matter what. A squeeze of lemon over the top that makes the whole plate sing. If you have ever searched for how to make the best chicken cutlets, wondered what the Food Network is doing differently, or tried recipe after recipe only to end up with something pale and soggy, this is your answer.
This recipe is inspired by the classic chicken kotlet tradition found in Eastern European and Persian cooking, where thin, well-seasoned cutlets are pan-fried to a gorgeous crisp. We have combined those timeless techniques with a few smart American upgrades, including a blend of plain and panko breadcrumbs for maximum crunch, and a surprising secret ingredient in the egg wash that keeps every bite impossibly tender.
The Secret Ingredient: Mayonnaise in the Egg Wash
If you have ever come across a chicken cutlets with mayonnaise recipe and raised an eyebrow, stay with us. Whisking just two tablespoons of mayo directly into the beaten eggs transforms your standard egg wash into something richer and more adhesive. The emulsified fat in the mayonnaise coats the chicken fibers as it cooks, locking in moisture and creating a noticeably more tender interior without any detectable mayo flavor in the final dish.
This is one of those professional kitchen tricks that quietly separates a good cutlet from a best ever one.
Chef's Tip: Do not skip pounding the chicken to an even 1/4-inch thickness. Uneven cutlets cook unevenly, leaving you with dry edges and an undercooked center. A few seconds with a meat mallet makes all the difference.
Choosing the Right Tools and Ingredients
Getting these cutlets right comes down to two things: a heavy skillet that holds heat evenly and a solid instant-read thermometer so you never have to guess doneness. A cast iron or stainless steel pan will give you a far better crust than a thin nonstick surface, which tends to cool down the moment the chicken hits it.
For the best flavor and texture, splurge on freshly grated Parmesan rather than the shelf-stable kind. These small choices are what separate a decent weeknight dinner from one that genuinely gets requests every time.
Building the Perfect Breadcrumb Coating
The breading is where most people go wrong, usually by using only one type of crumb. Here is what we use and why:
- Plain breadcrumbs provide a fine, even base coating that hugs the chicken tightly
- Panko breadcrumbs add dramatic crunch and an airy, shatteringly crisp top layer
- Grated Parmesan melts into the crust as it fries, adding a savory, nutty depth
- Smoked paprika, garlic powder, and onion powder season every single bite so the coating is never bland
Press the coating on firmly with your palm. Do not just dip and drop. Really press it in. Then let the breaded cutlets rest on a wire rack for at least five minutes before they hit the oil. That short rest gives the coating time to set and means far less of it falls off in the pan.
Pan-Frying vs. Convection Oven Chicken Cutlets
Pan-frying is the gold standard here, and it is faster than most people think. Each cutlet needs only 3 to 4 minutes per side over medium-high heat in shimmering oil. The key is not overcrowding the pan. Too many cutlets at once drops the oil temperature, which means your chicken steams rather than fries and you lose that gorgeous crust.
If you prefer a lighter option, convection oven chicken cutlets are a genuinely great alternative. Crank your oven to 425 degrees F on convection mode, spray the breaded cutlets liberally with cooking oil spray, and bake them on a wire rack for about 20 minutes, flipping once. The result is crispy, golden, and far less hands-on.
Chef's Tip: Always fry in batches and keep finished cutlets warm on a wire rack in a 200 degree F oven. Resting them on a plate traps steam underneath and softens the crust.
Ready to Make the Best Chicken Cutlets of Your Life?
Whether you are cooking for a quick weeknight dinner, meal prepping for the week, or trying to nail that one recipe everyone in your family requests, this is the one to bookmark. Grab your skillet and let us get into it.
The Best Crispy Chicken Cutlets (Pan-Fried to Golden Perfection)
These golden, crispy chicken cutlets are tender on the inside and perfectly crunchy on the outside, made with a seasoned breadcrumb coating that delivers incredible flavor in under 30 minutes.
Ingredients
- 2 lb boneless skinless chicken breasts, sliced horizontally into thin cutlets
- 1/2 cup all-purpose flour
- 2 large eggs, beaten
- 2 tbsp mayonnaise, mixed into egg wash for extra tenderness
- 1 cup plain breadcrumbs
- 1/2 cup panko breadcrumbs, for extra crunch
- 1/4 cup grated Parmesan cheese, finely grated
- 1 tsp garlic powder
- 1/2 tsp onion powder
- 1/2 tsp smoked paprika
- 1 tsp kosher salt, divided
- 1/2 tsp black pepper, freshly ground
- 3/8 cup neutral oil, such as avocado or vegetable oil, for frying
- 1 lemon, cut into wedges for serving
Instruction
Place the chicken breasts on a cutting board and slice each one horizontally through the center to create two thin cutlets. Cover with plastic wrap and pound to an even thickness of about 1/4 inch using a meat mallet or rolling pin. Season both sides lightly with salt and pepper.
Set up your dredging station with three shallow dishes: flour seasoned with a pinch of salt in the first, beaten eggs whisked together with the mayonnaise in the second, and the combined plain breadcrumbs, panko, Parmesan, garlic powder, onion powder, smoked paprika, salt, and pepper in the third.
Working one cutlet at a time, dredge it in the flour and shake off any excess. Dip it fully into the egg and mayonnaise mixture, letting the excess drip off. Press it firmly into the breadcrumb mixture on both sides, making sure the coating is even and well-adhered.
Place the breaded cutlets on a wire rack or a plate and let them rest for 5 minutes. This helps the coating stick and creates a crispier crust.
Heat the oil in a large heavy-bottomed skillet over medium-high heat until it shimmers and reaches about 350 degrees F (175 degrees C). Test by dropping in a breadcrumb; it should sizzle immediately.
Add the cutlets in a single layer without crowding, cooking in batches if necessary. Fry for 3 to 4 minutes per side until deep golden brown and the internal temperature reads 165 degrees F (74 degrees C) on an instant-read thermometer.
Transfer the cooked cutlets to a wire rack set over a baking sheet to drain. Avoid stacking them to keep the crust crispy. Serve immediately with lemon wedges.
Equipment
- Large heavy-bottomed skillet or cast iron pan
- Meat mallet or rolling pin
- 3 shallow dishes for dredging
- Wire rack with baking sheet
- Instant-read thermometer
- Tongs
- Plastic wrap
Notes
Serving, Storing, and Variations
How to Serve Chicken Cutlets
These cutlets are extraordinarily versatile. Serve them with a simple arugula salad and lemon, pile them on a toasted roll with pickles for a sandwich, slice them over pasta with marinara, or keep it classic with roasted potatoes and a green vegetable.
Storing and Reheating
Leftovers keep in the refrigerator for up to 3 days. For reheating, skip the microwave entirely and use a 400 degree F oven or air fryer for 8 to 10 minutes on a wire rack. They come back beautifully crispy every time.
Variations Worth Trying
- Buttermilk fried chicken cutlets: Soak the pounded chicken in buttermilk for up to 2 hours before breading for an extra-tender, slightly tangy result
- Lemon herb: Add lemon zest and fresh thyme to the breadcrumb mixture
- Spicy: Mix a teaspoon of cayenne into the flour for a kick of heat in every layer